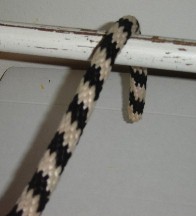


This is a photo demonstration of the Quick Release
tie. Since it's pouring down rain outside, I took
the photos inside on the rail in my closet. Once I can get outside
photos at the stables,
I'll have better photos put up.
This particular tie is the best one to use for tying
horses.
It is a Quick Release -- one pull on the end
and it will untie and release the horse.
That is one good part of the tie. The other good part is the fact that it
will
not tighten up if the horse pulls back.
There are many ways to tie a horse and anyone experienced
with being around them
knows that even most mild mannered horse can set back while tied.
Many of the ties people use will tighten up and the knot will not untied. Often
the
rope has to be cut to release the horse. This particular Quick Release tie
will not do that.
When the horse sets back, the two loops created on the first of the daisy
chain
will slide up to the rail and then stop. The horse can continue to pull but the
tie
will not tighten any further. Once the horse relaxes, the two loops will
easily
slide backwards on the rope. If a horse sets back, he can easily be
released by
pulling on the tail of the rope -- the daisy chain is pulled out and the rope
slides off the rail.
|
|
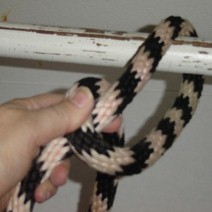
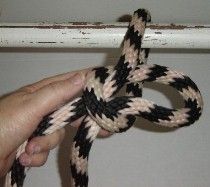
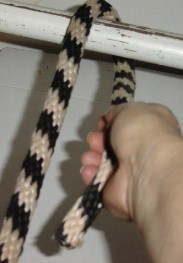 2. Bring end of rope under and back towards you |
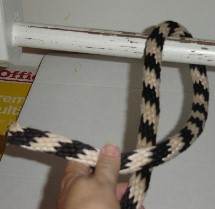 3. Cross Rope over top |
 4. Bring rope towards the rail |
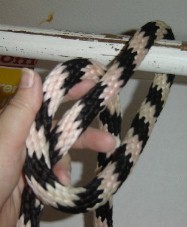 5. Bring rope over in front of the circle now formed |
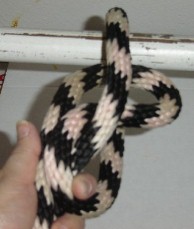 6. Bend the rope forming a loop and push it through the circle |
 6. Pull loop through, don't make an overly large loop |
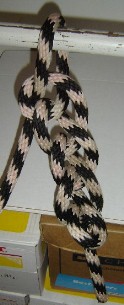
 7. This is the first loop in the daisy chain |
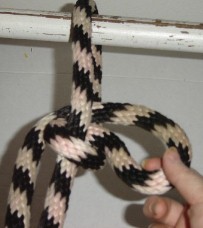
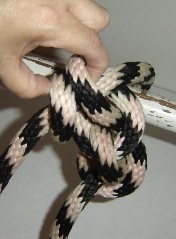
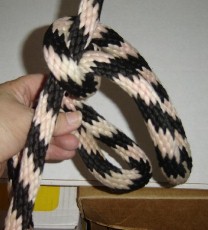 8. Form a second loop. |
 9. Second loop goes through the first loop |
 10. This shows two loops |
These photos illustrate what the loops like like, but not the actual way to make them. When actually forming the loops, I just hold open the first loop with the fingers of my left hand and reach through the loop with the fingers of my right hand to pull through the loop. This can be done very rapidly. If you have ever done any crocheting, you will recognize the action. |
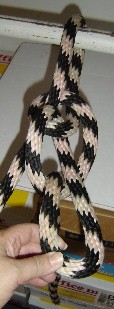
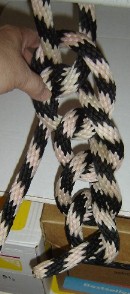
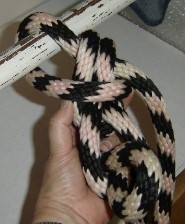
 11. Continue forming loops |
 12. When forming the loops do not make them large |
 13. Some horses learn to untie the knot. To "lock" the tie, put the tail end of the rope through the last loop. |
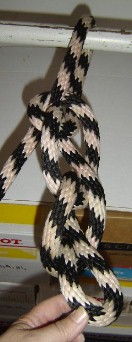
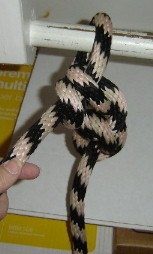 14. This photo shows the top of the tie. You can see that the first loop forms two small loops. |
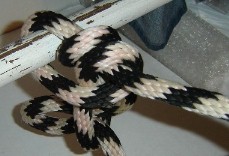 15. This illustrates how the two small loops will slide up to the rail when the horse pulls back on the lead. Once the loops hit the rail, they stop and will not tighten anymore . |
 16. This shows that the loops will easily slide back down |
 17. This shows the other side and shows how the lead line goes through the two loops. As you can see, the horse pulling back will simply cause the the loops to slide up and "lock" into place. |
I'll try to get video up that shows these steps better. |